Pumpkin Paradise
How pumpkin carving came to be and tips to follow
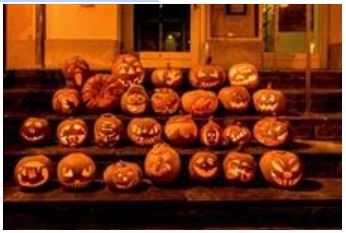
Carved pumpkins sit out on the porch anticipating trick or treaters to be spooked while they gather all the sweets they can carry.
Pumpkins are now in season, so be prepared. Grab your tools, bring out the sharpie, and get to planning because you do not want to be left behind on this.
The practice of making Jack-O’-Lanterns originated in Ireland where large turnips and potatoes were turned into canvases. The name itself came from the Irish folktale ”Stingy Jack,” who tricked the devil multiple times, forcing him not to bother jack up until his death. Soon after his death, God wouldn’t allow him in heaven and the devil wouldn’t send him to hell, and instead sent him into the dark night with burning coal on a carved turnip to light his way. The tale says that he has been roaming ever since.
Pumpkin Carving is not an easy task, the craft requires the proper tools and the right amount of creativity. You finally got the background knowledge to carve your perfect pumpkin.
What do I need?
Though some people buy kits with cute tools, you really only need two types of utensils; a serrated vegetable knife and a hacked soup ladle. The vegetable knife is the perfect knife to cut the nose, eyes, and mouth out with precision, just as you would cut fruits and veggies. A sharper knife is a safer knife, like the one shown in the picture above, it provides a smoother back and forth motion with a better grip than the ones in the Halloween tool kits. The hacked soup ladle is deeper than most kit scoopers and can get a lot more pumpkin guts in one scope than most.
The fun part: taking out the guts
Now you got the tools now you have got to cut a hole to get inside. Though not many people do this, cutting the hole from the bottom of the pumpkin is actually more efficient since most of the guts are connected to the bottom. Next, you want to scrape the walls of the pumpkin up to an inch or thicker. After that, you want to trace the design onto the pumpkin with a ballpoint pen to any design your heart desires, and then it’s time to carve.
The tricky part: carving your design
Actually carving the pumpkin, depending on your skill level, can be difficult. Your vision for the pumpkin will not begin to come out right as you cut into it so it will take some time. As you carve, reach inside and gently poke the pieces out so they can come out way easier and you can see your design come to life. Keep going until soon enough, you will have a finished jack-o’-lantern.
Tips to know
For more intricate pumpkins, you might want to refrigerate them and wrap them in plastic overnight to preserve the details. Another thing you want to note is disposing of the pumpkin once it is done. Carved pumpkins only take three to five days to rot so throwing it out on trash day or a more environmental way, composting.
You are finally finished with your jack-o’-lantern! Make sure your pumpkin doesn’t dry out so instead of using a candle, use a tea light and show your neighborhood who is the boss at pumpkin carving. Enjoy your Halloween!